How to Set Up a Custom Domain for Blogger: Complete Guide
What is a Custom Domain for Blogger?
So you’ve been running your blog on Blogger for a while now, and you’re ready to make it look more professional. One of the best ways to do that is by switching from that default blogspot.com address to your own custom domain name.
Trust me, it makes a huge difference. Instead of yourname.blogspot.com, you could have yourname.com or anything else you want. It just looks cleaner, more credible, and easier for people to remember.
A custom domain is essentially your own unique web address that you purchase and own. While Blogger gives you a free subdomain under blogspot.com, a custom domain gives you complete control over your blog’s identity.
It’s like moving from renting an apartment to owning your own house. You’re still using Blogger’s platform, but now you have your own branded address.
Why You Need a Custom Domain for Your Blogger Blog
The good news is that Blogger actually makes this process pretty straightforward. You don’t need to be a tech genius or know anything about coding.
The platform has built-in support for custom domains, which means once you buy a domain name, you can connect it to your existing blog without losing any of your content, posts, or followers. Everything stays exactly where it is, just with a new address.
Benefits of Using a Custom Domain
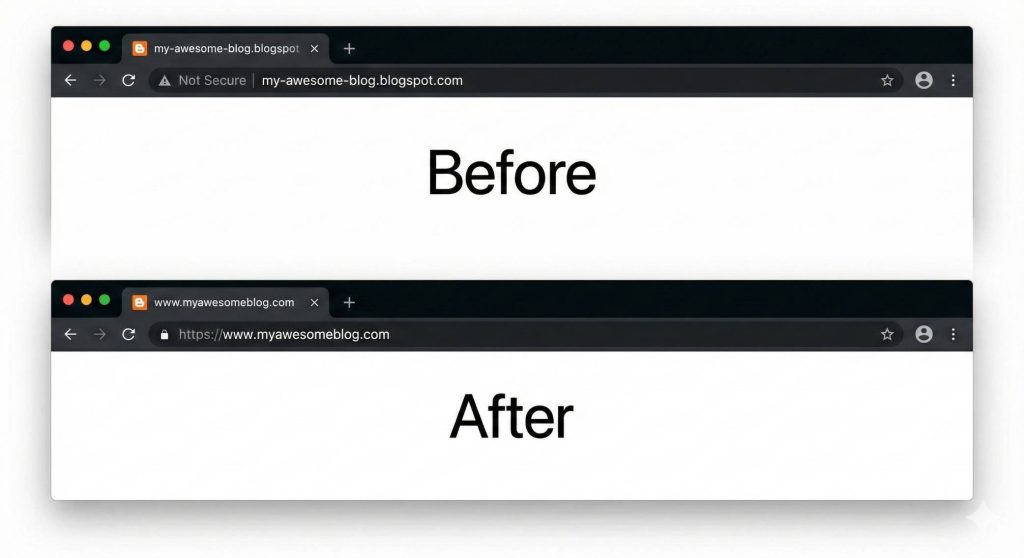
Having your own custom domain brings several important advantages. First, it boosts your credibility significantly. When readers see a professional domain name, they automatically trust your content more. Compare “myblog.blogspot.com” with “myblog.com” – which one looks more professional? The answer is obvious.
Second, it’s much better for branding. Your domain name becomes your brand identity. It’s what people remember and share. If you’re building a business or trying to establish yourself as an authority in your niche, a custom domain is absolutely essential.
Third, you get better search engine optimization. Google and other search engines tend to favor custom domains over free subdomains. While it’s not the only ranking factor, it definitely helps. Plus, having your keywords in your domain name can give you a small SEO boost.
Fourth, you look more professional to sponsors and advertisers. If you’re planning to monetize your blog through sponsorships, affiliate marketing, or ads, brands take you much more seriously when you have a custom domain. It shows you’re committed and professional.
[AI image prompt for nano banana: “A graph showing upward growth with icons representing credibility, branding, SEO, and monetization, modern infographic style, vibrant colors”]
How Much Does a Custom Domain Cost?
Let’s talk money because that’s usually everyone’s first concern. Domain names are surprisingly affordable. Most domain registrars charge between ten to twenty dollars per year for a standard domain. That’s less than two dollars a month. Some extensions like .blog or .online might be cheaper, while premium domains can cost more.
The .com extension is the most popular and usually costs around twelve to fifteen dollars annually. It’s the one I recommend because people automatically assume websites end in .com. You can also consider .net, .org, .blog, .site, or country-specific extensions like .co.uk or .in depending on your target audience.
Many registrars offer discounts on your first year, so you might pay as little as five to ten dollars initially. Just be aware that the renewal price will likely be higher in subsequent years. Always check the renewal price before committing to a registrar.
Where to Buy a Domain Name for Blogger
There are dozens of domain registrars out there, but some are better than others. Here are the most popular and reliable options:
Google Domains (now part of Squarespace) is excellent for Blogger users because it integrates smoothly. The interface is clean and simple, and the DNS settings are straightforward. Pricing is transparent with no hidden fees.
Namecheap is another great option that lives up to its name. They offer competitive pricing, free WHOIS privacy protection, and excellent customer support. Their DNS management is user-friendly even for beginners.
GoDaddy is the biggest domain registrar in the world. They’re well-known and reliable, though their interface can be a bit cluttered with upsells. They do offer good customer support and frequent promotions.
Domain.com offers a clean interface and solid customer service. They often have promotional deals and their DNS setup process is straightforward.
DotPapa is an emerging domain registrar that’s gaining popularity, especially in India and other Asian markets. They offer competitive pricing, simple domain management, and a user-friendly interface. Their customer support is responsive, and they provide all the essential DNS management tools needed to connect domains to Blogger. DotPapa is particularly good for bloggers looking for affordable domain options with straightforward setup processes.
Bluehost and HostGator also sell domains, though they’re primarily hosting companies. They can be good options if you’re considering eventually moving to WordPress.
How to Choose the Perfect Domain Name
Picking the right domain name is crucial because you’ll be stuck with it for a long time. Here’s what you need to consider: for choosing a perfect domain also use dotpapa AI domain name generator
Keep it short and simple. Aim for something under fifteen characters if possible. Shorter names are easier to remember, easier to type, and look cleaner on business cards or promotional materials.
Make it memorable and brandable. Your domain should stick in people’s minds. Avoid generic names that sound like every other blog. Think about brands like BuzzFeed, Lifehacker, or TechCrunch – they’re unique and memorable.
Avoid numbers and hyphens. When you tell someone your domain verbally, you don’t want to have to explain “that’s the number four, not the word four” or “there’s a hyphen between best and recipes.” It just creates confusion and increases the chance of typos.
Include keywords if it makes sense. If you’re running a fitness blog, having “fit” or “health” in your domain can help with SEO. But don’t force it. Your brand name is more important than exact keyword matching.
Check social media availability. Before finalizing your domain, check if the same name is available on Instagram, Twitter, Facebook, and other platforms you’ll use. Consistent branding across all channels is important.
Make sure it’s easy to spell. Avoid unusual spellings or words that people commonly misspell. You don’t want to lose traffic because people can’t figure out how to type your domain correctly.

Step-by-Step: Buying Your Domain Name
Let me walk you through the actual process of purchasing a domain. This example uses Namecheap, but the process is similar across most registrars.
Start by going to your chosen registrar’s website and using their domain search tool. Type in your desired domain name and hit search. The tool will show you if it’s available and suggest alternatives if it’s taken.
If your first choice is taken, don’t panic. The tool will suggest variations and different extensions. Sometimes adding a word like “blog,” “site,” or “hub” to your name works well. Or you might find that a different extension like .blog or .net is available and actually fits your brand better.
Once you find an available domain you like, add it to your cart. You’ll be asked to select a registration period – typically one, two, or more years. I recommend starting with one year if you’re unsure, but buying multiple years upfront can sometimes save you money.
During checkout, you’ll be offered various add-ons. The most important one is WHOIS privacy protection. This keeps your personal information private in the public domain registry. Many registrars include this free, but some charge extra. It’s worth getting because otherwise your name, address, email, and phone number will be publicly searchable.
Skip the other upsells like website builders, email hosting, or SSL certificates for now. Blogger provides what you need for free. You can always add these services later if necessary.
Complete the purchase by creating an account with the registrar and entering your payment information. You’ll receive a confirmation email with your account details. Save this email somewhere safe.
You can also search for your desired domain using the search bar below and buy it at an affordable price.
Part 2: Add DNS Records to Your Domain Registrar
Now you need to add these DNS records at your domain registrar. I’ll show you how to do this for the most popular registrars.
For Namecheap:
Log into your Namecheap account and go to your Domain List. Click “Manage” next to the domain you want to configure.
Navigate to the “Advanced DNS” tab. You’ll see a section for “Host Records.”
Click “Add New Record” and select “CNAME Record” from the dropdown.
For the first record, enter “www” in the Host field and “ghs.google.com” in the Value field. Set TTL to “Automatic” or “5 min.”
Add another CNAME record with the verification code from Blogger as the Host and the corresponding Google verification address as the Value.
Delete any existing CNAME records for “www” if they exist, as they’ll conflict with your new settings.
Click the green checkmark to save each record.
For GoDaddy:
Log into GoDaddy and go to your products list. Click “DNS” next to your domain.
Scroll down to the Records section. Click “Add” to create a new record.
Select “CNAME” as the type. Enter “www” for the Name and “ghs.google.com” for the Value.
Click “Add Record” again and create the verification CNAME record using the information from Blogger.
For DotPapa:
Connecting your DotPapa domain to Blogger is straightforward and very similar to other registrars. Here’s the complete step-by-step process:
Log into your DotPapa account at www.dotpapa.com and navigate to your dashboard. You’ll see a list of all your registered domains.
Click on “Manage” or “CF DNS Management” next to the domain you want to connect to Blogger. This will take you to the DNS settings page.
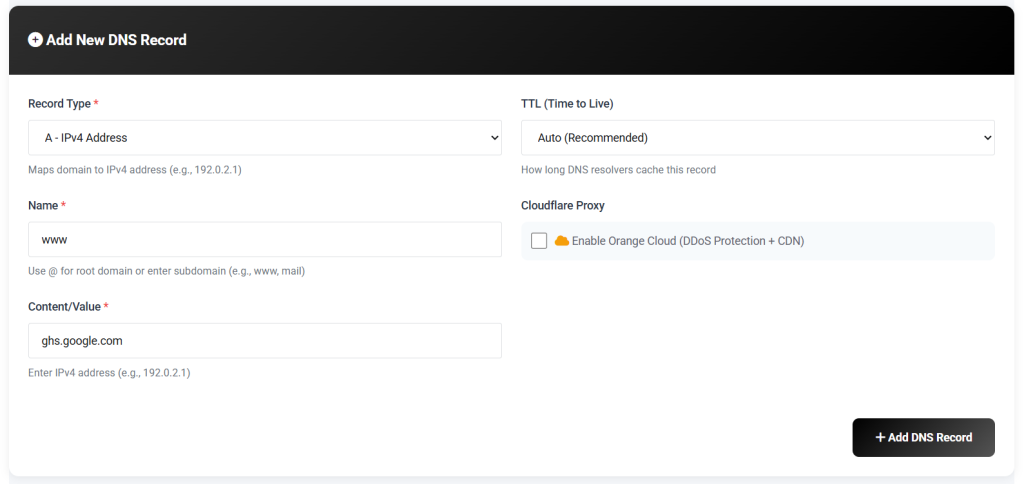
Look for the CF DNS Records section. You should see options to add different types of records. Click on “Add Record” or “Add New DNS Record.”
From the record type dropdown, select “CNAME Record.”
For the first CNAME record, enter the following details:
- Host/Name: www
- Points to/Value: ghs.google.com
- TTL: Leave it at default (usually 3600 or Auto)
Click “Save” or “Add Record” to save this first CNAME record.
Now add the second CNAME record for verification. Click “Add Record” again.
Enter the verification details from your Blogger settings:
- Host/Name: (paste the verification code from Blogger, something like “abcdefgh1234”)
- Points to/Value: (paste the Google verification URL from Blogger, something like “gv-xxxxxxxxxxxx.dv.googlehosted.com”)
- TTL: Leave at default
Click “Save” to add this verification record.
If there are any existing CNAME records for “www,” you need to delete them first before adding the new ones. Look for a delete or trash icon next to old records.
Now you need to set up the naked domain redirect (for the non-www version). In your DotPapa DNS settings, look for “URL Redirect” or “Domain Forwarding” option.
Add a new URL redirect with these settings:
- Source/From: @ (this represents your naked domain)
- Destination/To: http://www.yourdomain.com
- Redirect Type: Permanent (301)
Save this redirect setting.
That’s it! Your DotPapa domain DNS settings are now configured. The interface is clean and simple, so you shouldn’t have any trouble finding these options.
For Google Domains:
Access your Google Domains account and select your domain. Click on “DNS” in the left menu.
Scroll to “Custom resource records.” Select “CNAME” from the dropdown.
Enter “www” as the name and “ghs.google.com” as the data. Click “Add.”
Add the verification CNAME record the same way.
Part 3: Wait for DNS Propagation
After adding the CNAME records, you need to wait for DNS propagation. This is the process of your DNS changes spreading across the internet. It can take anywhere from fifteen minutes to forty-eight hours, though it’s usually complete within a few hours.
During this time, your domain might work intermittently or not at all. This is completely normal. Don’t panic and don’t change your settings multiple times trying to “fix” things. Just be patient.
You can check if your DNS has propagated by using online tools like “DNS Checker” or “What’s My DNS.” These tools show you if your DNS records are visible from different locations around the world.
Part 4: Complete Setup in Blogger
Once your DNS has propagated, go back to your Blogger settings and try saving your custom domain again. This time it should work without errors.
You’ll see a checkbox that says “Redirect [yourblog.blogspot.com] to [www.yourdomain.com].” Make sure this is checked. This ensures that anyone visiting your old blogspot.com address gets automatically redirected to your new custom domain. This is crucial for maintaining your search engine rankings and not losing visitors.
Setting Up HTTPS for Your Custom Domain
Security is important, and having HTTPS (that little padlock in the address bar) is essential for trust and SEO. Fortunately, Blogger provides free SSL certificates for custom domains.
In your Blogger settings, look for “HTTPS” in the Settings menu. You’ll see two options:
“HTTPS Availability” – This enables HTTPS for your blog. Turn this on.
“HTTPS Redirect” – This forces all visitors to use the secure HTTPS version. Turn this on too.
When you first set up your custom domain, the HTTPS option might not be available immediately. The SSL certificate can take up to twenty-four hours to become active after your domain is connected. If you don’t see the HTTPS options right away, just check back later that day or the next day.
Once HTTPS is enabled and you’ve turned on the redirect, anyone who tries to visit the http version of your site will automatically be sent to the https version. This is exactly what you want.
Common Problems and How to Fix Them
Even when you follow all the steps correctly, sometimes things go wrong. Here are the most common issues and their solutions.
“We have not been able to verify your authority to this domain”
This error means Blogger can’t confirm you own the domain. Usually, it’s because the DNS records haven’t propagated yet. Wait a few more hours and try again. If it persists after twenty-four hours, double-check that your CNAME records are entered exactly as Blogger specified, with no extra spaces or typos.
“Another blog is already hosted at this address”
This means the domain is already connected to a different Blogger blog. You can only connect one domain to one blog. Make sure you’re not accidentally trying to use a domain that’s already in use. If you recently deleted a blog, it can take a few days for the domain to become available again.
“Error 404 – Page Not Found” after setup
If your domain connects successfully but shows a 404 error, check that your blog is set to “Visible to search engines” in the Settings. Also verify that the HTTPS redirect is working properly. Sometimes clearing your browser cache and cookies helps.
Domain works with www but not without
This means your naked domain redirect isn’t set up correctly. Go back to your domain registrar’s forwarding or redirect settings and make sure you’ve configured the naked domain to forward to the www version.
DotPapa-Specific Issues
If you’re using DotPapa and experiencing connection issues, make sure you’ve completely deleted any default DNS records that might conflict with the Blogger CNAME records. DotPapa sometimes has default parking page records that need to be removed first.
Also, check that your domain is not locked. In your DotPapa dashboard, verify that the domain status is “Active” and not “Locked” or “On Hold.”
Some pages work but others show errors
This usually indicates a mixed content issue if you recently enabled HTTPS. Check that any custom widgets, gadgets, or templates are using HTTPS links, not HTTP. You may need to update some code in your template.
Updating Your Blog After Domain Change
Once your custom domain is working, there’s some housekeeping to do to make sure everything is updated.
Update Social Media Profiles
Go through all your social media accounts and update your website link to your new custom domain. This includes:
- Facebook page
- Instagram bio
- Twitter profile
- LinkedIn profile
- Pinterest profile
- YouTube channel
- Any other social platforms you use
Update Email Signatures
If you have your blog URL in your email signature, update it to reflect your new custom domain. This is especially important if you use your blog for professional purposes.
Update Business Cards and Marketing Materials
If you have physical marketing materials with your old blogspot.com address, you’ll eventually want to update these. For now, the redirect will handle traffic from the old address, but for new materials, always use your custom domain.
Submit to Google Search Console
Google Search Console is a free tool that helps you monitor your blog’s performance in search results. You should add your new custom domain as a property.
Go to Google Search Console and click “Add Property.” Enter your new domain with the https:// prefix. Follow the verification steps, which usually involve adding a meta tag to your blog or verifying through your Google account.
Keep your old blogspot.com property in Search Console too, at least for a few months. This lets you monitor that the redirects are working and track any lingering traffic to the old address.
Update Internal Links (Optional)
Your old internal links pointing to blogspot.com URLs will still work because of the redirect, but if you want everything perfect, you can update them to your new custom domain. This isn’t urgent, but it’s good practice for the long term.
You can use Blogger’s search and replace function in your posts, or manually update important posts over time.
[Image needed here: Checklist graphic showing all the places to update your domain]
SEO Considerations for Domain Migration
One of the biggest concerns people have about changing domains is losing their search engine rankings. Here’s the truth: if you do it correctly, you won’t lose your rankings.
The redirect from your old blogspot.com domain to your custom domain is a permanent 301 redirect. Search engines understand this means “the content has permanently moved to this new address.” Google will transfer your ranking signals to the new domain.
However, there might be a temporary flux in rankings during the first few weeks as Google reprocesses your site. This is normal. Your traffic might dip slightly before recovering and often improving because custom domains tend to perform better in search results.
To minimize any negative impact:
Make sure the redirect is set up correctly. Test by visiting your old blogspot.com URLs and confirming they redirect to the custom domain.
Keep all your content exactly the same. Don’t delete posts or make major changes during the domain transition.
Update your sitemap. Blogger automatically generates a sitemap, but make sure it’s submitted to Google Search Console with your new domain.
Be patient. Give it at least a month for everything to stabilize in search results.
Keep creating quality content. The best thing you can do for your SEO is to continue publishing valuable content regularly.
[AI image prompt for nano banana: “A website smoothly transitioning from old domain to new domain with Google search results showing the progression, modern illustration style”]
Custom Domain vs. Moving to WordPress
Some people wonder if they should just move to WordPress instead of adding a custom domain to Blogger. Let me give you the honest comparison.
Blogger with a custom domain gives you professionalism at minimal cost. You pay only for the domain (twelve to twenty dollars per year) and nothing else. Blogger provides free hosting, free SSL, free technical support, and automatic backups. The platform is incredibly reliable because it’s run by Google.
WordPress self-hosted requires a domain plus hosting, which together cost around seventy to one hundred fifty dollars per year minimum. You’re responsible for updates, security, backups, and technical issues. The trade-off is that WordPress offers much more flexibility, thousands of plugins, and more customization options.
If you’re happy with Blogger’s features and you like the simplicity, there’s absolutely no reason to switch to WordPress just because you want a professional domain. A custom domain on Blogger is just as legitimate as a WordPress site. Save yourself the money and complexity.
However, if you need specific features that Blogger doesn’t offer – like an online store, membership areas, advanced forms, or extensive design customization – then WordPress might make sense. But for most bloggers, especially those focused on writing and content creation, Blogger with a custom domain is perfect.
Why DotPapa is a Good Choice for Bloggers
If you’re specifically considering DotPapa as your domain registrar, here are some reasons why it’s a solid choice for Blogger users:
Affordable Pricing: DotPapa offers competitive rates, especially for Indian bloggers and those in South Asian markets. Their pricing is transparent with no hidden fees.
Simple Interface: The dashboard is clean and intuitive, making it easy for beginners to manage DNS settings without getting overwhelmed.
Local Support: For bloggers in India and nearby regions, DotPapa provides local customer support in multiple languages, which can be helpful when you need assistance.
Quick DNS Updates: DNS changes on DotPapa typically propagate faster than some other registrars, meaning your domain connects to Blogger more quickly.
No Upselling: Unlike some larger registrars, DotPapa doesn’t bombard you with constant upsells for services you don’t need.
Good for Beginners: If this is your first time buying a domain and connecting it to Blogger, DotPapa’s straightforward process makes it less intimidating.
The main thing to remember with DotPapa is that their interface might look slightly different from the screenshots you see in other tutorials (which usually show GoDaddy or Namecheap), but the basic principles are exactly the same. You’re still adding CNAME records and setting up redirects – just in a slightly different-looking dashboard.
Renewing Your Domain
Domains need to be renewed annually (or whatever period you initially purchased). Most registrars including DotPapa will send you email reminders before your domain expires, usually starting thirty days before expiration.
It’s absolutely critical that you renew on time. If your domain expires, your blog will stop working. Visitors will see an error message, and you’ll lose traffic. Worse, if you let it expire completely, someone else could potentially buy it.
I recommend setting up automatic renewal for your domain. This ensures you never accidentally forget and your blog stays online. You can always cancel the automatic renewal later if you decide you don’t want to keep the domain.
Most registrars also offer domain privacy renewal. Make sure this is included in your renewal or set to auto-renew as well, so your personal information stays protected.
Is a Custom Domain Worth It?
After everything we’ve covered, you might still be wondering: is this really worth it?
The answer is absolutely yes if you’re at all serious about blogging. The cost is minimal – less than what you’d spend on two cups of coffee per month. The setup takes a few hours at most, even if you’re doing it for the first time. And the benefits are substantial and ongoing.
Your blog instantly looks more professional and trustworthy. Your brand identity becomes stronger and more memorable. Your search engine performance improves. You open doors for monetization and collaboration opportunities. And you actually own your web address instead of borrowing one from Google.
For the small investment of time and money, you’re making a statement that your blog matters, that you’re committed, and that you’re building something real. That mindset shift alone is often enough to motivate bloggers to create better content and take their blog more seriously.
Final Thoughts
Setting up a custom domain for your Blogger blog is one of the best decisions you can make for your online presence. Whether you choose Namecheap, GoDaddy, DotPapa, or any other registrar, the process is fundamentally the same and straightforward.
You’ve learned everything you need to know: how to choose and buy a domain, how to connect it to Blogger through DNS settings (including specific instructions for DotPapa users), how to enable HTTPS for security, and how to handle common problems. You also know how to properly redirect your old blogspot.com address, update your online presence, and maintain your SEO rankings through the transition.
The key is to just get started. Pick a domain name that represents your blog well, buy it from a reputable registrar like DotPapa or any other trusted provider, and follow the setup steps carefully. Take your time, double-check your DNS entries, and be patient while everything propagates. Before you know it, you’ll have a professional custom domain that you can be proud of.
Your blog deserves a proper home on the internet. A custom domain is that home. It’s the foundation for everything else you want to build online. So stop putting it off and make it happen. Your future self will thank you for taking this step toward a more professional, successful blog.
Now go choose that perfect domain name and get your blog the address it deserves. You’ve got this!