
How to Buy web Hosting from DotPapa, A Step-by-Step Guide 2025
Are you looking to launch a website but unsure about how to get started with hosting? then we are here for your problem solution, in this article we will walk you through the process of purchasing web hosting from DotPapa,
ensuring your online journey begins smoothly and efficiently. so lets began with step by step guide how to buy a hosting plan.
What is DotPapa?
DotPapa is a reliable web hosting provider dedicated to delivering high-performance hosting solutions with exceptional customer support.
Whether you’re launching a personal blog, business website, or e-commerce platform, we have the perfect hosting package to meet your needs. We offer a variety of hosting plans starting from just ₹69.
Step 1: Assess Your Hosting Needs
Before making a purchase, it’s important to decide the type of hosting you need.
If you’re new to the online world and want to create a static website for yourself, a client, or your business, the best option is to start with our Shared Hosting Starter Plan.
You can choose any billing cycle — monthly, annually, or any available term—we don’t have any no hidden fees.
As your website grows, you can easily upgrade your plan. If you’re an experienced or professional user, our Premium Cloud Hosting Plan is the ideal choice. It includes CP Guard Security for enhanced protection.
- Shared Hosting: Ideal for beginners and small websites with moderate traffic.
- Cloud Hosting: Offers scalability and reliability for websites of all sizes.
When selecting a hosting plan, consider factors such as expected traffic, technical requirements, budget, and future growth.
Step 2: Visit the DotPapa Website
Navigate to www.dotpapa.com using your preferred web browser. Our homepage features a clear navigation menu where you can explore our hosting options. then navigate any of these hosting plans Shared, WordPress,Cloud, Developer Hosting Plans from Navigation Menu in Hosting Dropdown.
Step 3: Browse Available Hosting Plans
Click on “Hosting” in the main navigation menu to view our range of hosting packages. Each plan includes detailed information about:
- Disk space and bandwidth
- Number of websites allowed
- Email accounts
- Databases
- Technical specifications
- Pricing and billing cycles
Take your time to compare plans and select the option that best aligns with your requirements.
Step 4: Select Your Plan
Once you’ve finalized the hosting plan that suits your needs, click the “Select” button. This will add the hosting package to your cart and begin the checkout process. We’ve shared a screenshot below for your reference.

Step 5: Choose a Domain Name
After clicking “Select,” you’ll be prompted to choose a domain. On this page, you’ll see three options: you can register a new domain, transfer a domain from another registrar, or use an existing domain you already own.
Simply choose the option that suits your needs and enter the domain name you want to associate with your hosting plan. We’ve shared the steps below to help guide you through the process.
- Register a new domain name
- Tranfer your domain from another registrar,
- i will use my existing domain and update nameservers.
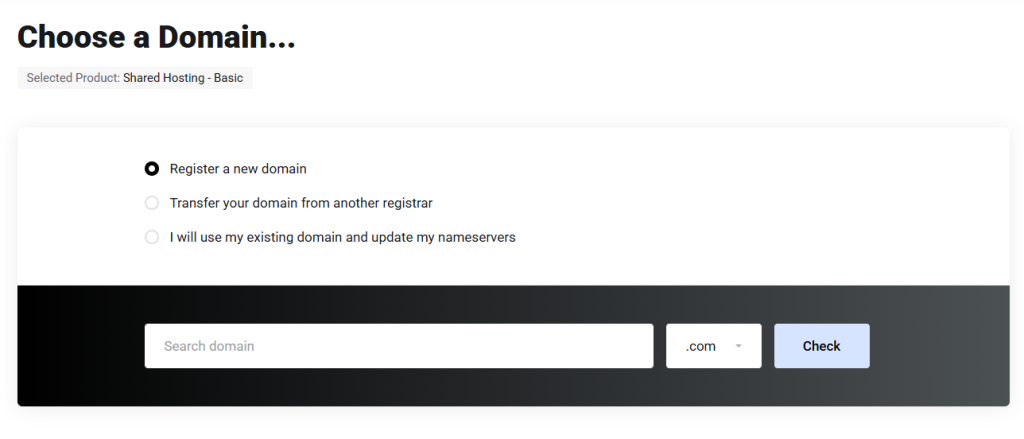
If registering a new domain, enter your desired domain name to check its availability. If using an existing domain, you’ll need to update your DNS settings after completing your purchase.
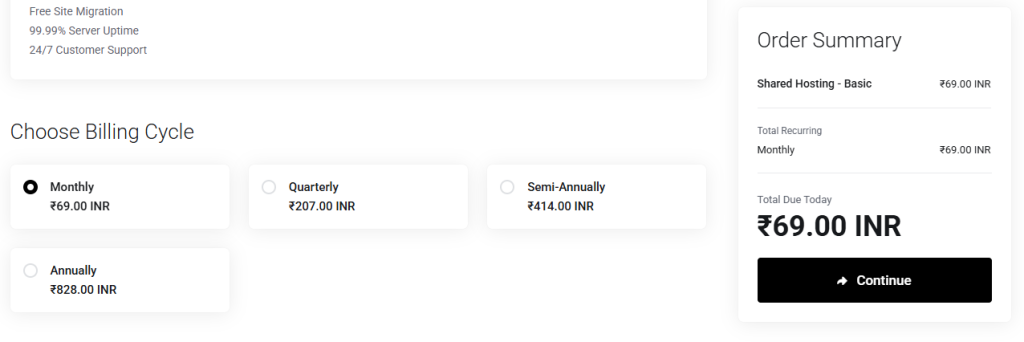
Step 6: Choose Billing Cycle For Your Hosting Package
On this step, you’ll need to select the billing cycle for your hosting plan. We offer flexible options including monthly, Quatarly, Semi-Annually, yearly, to fit your budget and preferences.
You can start with a shorter term to test our services or choose a longer-term plan for better value and savings. There are no hidden charges—what you see is what you pay. Select the billing cycle that works best for you before proceeding to the next step.
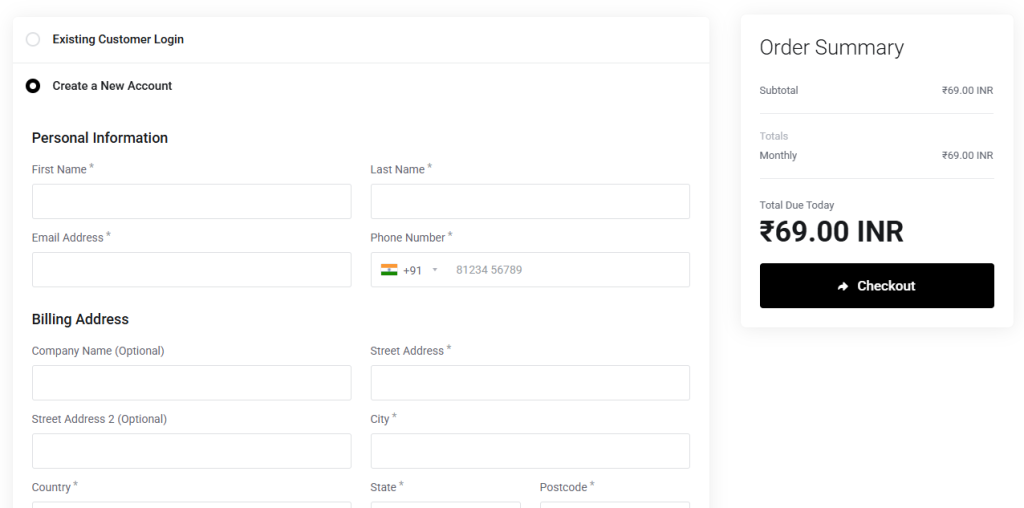
Step 7: Review & Create Your Account
If you’re a new customer, you’ll need to create an account with DotPapa. Before that, if you have a promo code, you can apply it by entering the code and clicking “Validate Code.” After applying the promo code, you can proceed to log in or create a new account on DotPapa.

If you already have an account on DotPapa, simply log in. If you don’t have an account, create a new one. with some information like —
- Personal details (name, email address, phone number)
- Billing address
- Secure password
Step 8: Choose Payment Method Complete Your Payment
Review your order summary to ensure all the details are correct. Then, choose your preferred payment method—options include PhonePe, CCAvenue, and others. You can select whichever method you prefer to complete your purchase.
- Enter your payment information
- Select your preferred payment method (Upi, credit card, Debit card, PayPal, etc.)
- Agree to our Terms of Service and Privacy Policy
- Click “Complete Purchase” to finalize your order
Step 9: Verify Your Email
After completing your purchase, you’ll receive a confirmation email with important information about your hosting account. Click the verification link to activate your account.
Step 10: Access Your Control Panel
Once your account is verified, you can access your hosting control panel (cPanel or our custom DotPapa dashboard). Log in using the credentials provided in your confirmation email.
Getting Started with Your New Hosting
Now that you’ve successfully purchased hosting from DotPapa, you can use as you want,
- Install your preferred content management system (WordPress, Joomla, etc.)
- Upload your website files
- Set up email accounts
- Install SSL certificates
- Configure databases
Need Assistance?
Our dedicated support team is available 24/7 to help you with any questions or issues you may encounter, we are avaiable multiple support system shared below.
- Live Chat: Available directly right bottom from our website.
- Email Support: directly email us at [email protected].
- Phone Support: +91 6297498411
- Open a Ticket: Access our website and login with your account then in the header of our site you will get a “Open A Ticket” option with that option you can create a support ticket.
Why Choose DotPapa?
- Reliable Performance: 99.9% uptime guarantee from dotpapa.
- Expert Support: 24/7 customer assistance like your friend.
- User-Friendly Interface: Intuitive easy control panel like never.
- Scalable Solutions: Grow your hosting as your website expands, you can upgrade anytime.
- Competitive Pricing: High-quality hosting at affordable rates than market.
- Security First: Advanced security features included like CP Guard.
Thank you for choosing DotPapa as your web hosting provider. We look forward to helping you establish and grow your online presence!